
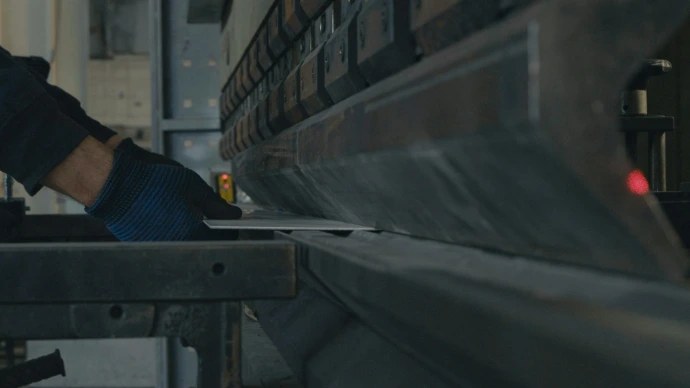
For most parts, specify an inside bend radius about equal to the material thickness for mild steel and soft aluminium, and 1.5 to 2 times the thickness for stainless. Harder aluminium alloys need more, often 1.5 to 3 times thickness or larger.
Get the radius wrong and you pay for it one of two ways: a radius that's too tight cracks the outside of the bend, and a radius the shop can't match changes your flat pattern and your final dimensions. Here's how the radius actually forms on a press brake, what to ask for per material, and how to put it on your drawing so nobody has to guess.
Why there's no such thing as a sharp bend
When sheet folds, the outside of the bend stretches and the inside compresses. The metal can only stretch so far before it starts to crack. That limit is why every bend has a radius, even if your CAD model shows a crisp corner.
Draw a part with a zero radius and one of two things happens. Either the shop applies its normal radius anyway and your dimensions shift slightly, or someone has to email you to ask what you meant. Neither is a disaster, but both are avoidable.
The radius on your drawing should be the inside radius: the curve on the inside of the bend. The outside radius is simply the inside radius plus the thickness.
Starting radius by material
These are industry rules of thumb, not guarantees. Every shop's tooling is a bit different, so treat the numbers as a sensible starting point and confirm on the quote.
| Material | Typical starting inside radius | Notes |
|---|---|---|
| Mild steel | About 1× thickness | Forgiving; bends cleanly at 1T in most thicknesses |
| 3CR12 | About 1× thickness, a bit more on thicker plate | Forms more like mild steel than like 304 |
| Stainless 304 / 316 | About 1.5–2× thickness | Work-hardens and springs back more |
| Soft aluminium (1050, 3xxx, 5xxx in soft tempers) | About 1× thickness | Bends much like mild steel |
| Hard aluminium (6061-T6 / 6082-T6 type) | About 1.5–3× thickness or more | Prone to cracking; check grain direction |
So for a 2 mm mild steel bracket, a 2 mm inside radius is a safe call. For the same bracket in 2 mm 304, ask for 3 to 4 mm. If you're bending harder aluminium, our guide to bending aluminium without cracking goes into alloys, tempers, and grain.
How the radius really forms: the die opening
Most press brake work is air bending. The punch pushes the sheet partway into a V-shaped die and the sheet only touches the punch tip and the two die shoulders. That means the radius isn't stamped by the punch. It forms naturally across the gap.
A widely used rule from press brake tooling suppliers is that, for mild steel, the air-bent inside radius comes out at roughly 16% of the V-die opening. Stronger materials like stainless form a somewhat larger radius in the same die.
Some numbers to make that real:
- 2 mm mild steel in a 16 mm die (8× thickness) gives an inside radius of around 2.6 mm.
- 3 mm mild steel in a 24 mm die gives roughly 3.8 mm.
- To get closer to a 2 mm radius on 2 mm steel, the shop would pick a narrower die, around 12 mm.
Die openings of roughly 6 to 8 times thickness are typical for sheet. Go much narrower than that and the force climbs and angle accuracy suffers, so a shop won't push a very small radius just because the drawing asks for it.
This is also why the radius tolerance on a sheet metal drawing should be generous. If you call out "R2 ±0.1", you're asking for something air bending can't promise. "R2 approx." or "R2 to suit tooling" is honest and far easier to quote.
When to ask for a bigger radius
A larger radius isn't a compromise. Sometimes it's the better design.
- Stainless and hard aluminium. A larger radius takes strain off the outside of the bend, which is where cracks start.
- Parts that get handled. A rounder outside corner is kinder on hands, cable insulation, and the gasket it presses against.
- Visible architectural parts. A soft, consistent radius often looks more deliberate than a tight crease.
- Thick plate. Bending heavy plate to 1T needs a lot of force and a narrow die. Asking for 1.5 to 2T often matches the tooling better.
There's a catch at the other extreme. Very large radii, eight times thickness and up, spring back a lot more and are harder to hold to an angle. If you need a big sweeping curve, mention it, because it's done differently from a normal bend. Our post on springback explains why.
How the radius changes your flat pattern
The bend radius isn't just a cosmetic detail. It changes how much material each bend consumes, which changes the size of the flat blank.
A part drawn with a 1 mm radius and bent with a 3 mm radius will come out with slightly different flange lengths, because the flat pattern was built around the wrong curve. On a single bend the difference is small. On a box with eight bends, it adds up.
That's the reason we'd rather receive a 3D model and build the flat pattern ourselves, using the radius we'll actually get. If you build your own flat DXF, use the radius and K-factor the shop gives you. Our explainer on the K-factor and bend allowance shows the maths.
How to call it out on your drawing
Keep it short and clear:
- Give the inside radius, for example "All inside bend radii R2 unless noted".
- Allow a tolerance that matches reality, or mark it as approximate.
- Flag the bends that matter. If one radius must clear a pipe or match a mating part, say so on that bend only.
- State the material and temper, especially for aluminium. "5052" and "6082-T6" behave very differently.
- Dimension to the outside of flanges where possible. That's what's easiest to measure after bending.
Send that with your STEP file or PDF and the bend radius stops being a question.
Getting it bent
Our CNC bending service works with mild steel, stainless steel, aluminium, and 3CR12. Put the material, thickness, radius (or "standard"), and quantity on the quote. If you're unsure which radius or material suits the job, say so in the notes and we'll help.
Start a quote for CNC bending and add laser cutting or powder coating to the same order.